This book aims to showcase the fossil fauna using high-contrast photography. The process of coating fossil specimens with a contrasting agent is an older one, but I don’t know where it originated. During a meeting for the New York Academy of Sciences in March of 1901, five members of the section of geology and mineralogy discussed a paper by G. van Ingren that outlined a “Method of Facilitating Photography of Fossils.” It required three separate bottles, one wide-mouthed gallon bottle, a one-quart bottle filled with water ammonia, a one-quart bottle filled with strong hydrochloric acid, and U-shaped tubes filled with chloride. A series of tubes connected these, and by blowing air into one of the tubes, you would force the gases out together at a point to create ammonium chloride vapor.
The members discussed that while photography was cheap, it was still troublesome to produce a quality negative. Photography as a replacement for illustration was unfavorable for most paleontologists of the day. The illustration of specimens was also tricky; common problems included the unconscious creative bias brought by each illustrator and how hard it was to find one to do the work. There are other problems with fossil illustration. Many illustrators have filled in missing pieces by mirroring a specimen or fixing obscured or broken parts. This creativity leads to confusion later, as older specimens in review often arrive and can surprise researchers with their actual condition.
Today, it is much simpler to coat fossils using a contrasting agent. A dry solid powder form of ammonium chloride costs approximately $2.30 per pound (if you buy 10 pounds, July 2022). Coating all the fossils photographed in this book required less than one pound of powder. Using the simple tools illustrated in figure X, a worker can cover hundreds of fossil specimens for less than $75.
While cameras can be expensive, smartphone ownership in the United States surpasses ownership of all computing devices (U.S. Census, 2018). Most people in the U.S. have access to a smartphone camera, and digital photography has removed many problems with traditional chemical photography.
Creating the Device
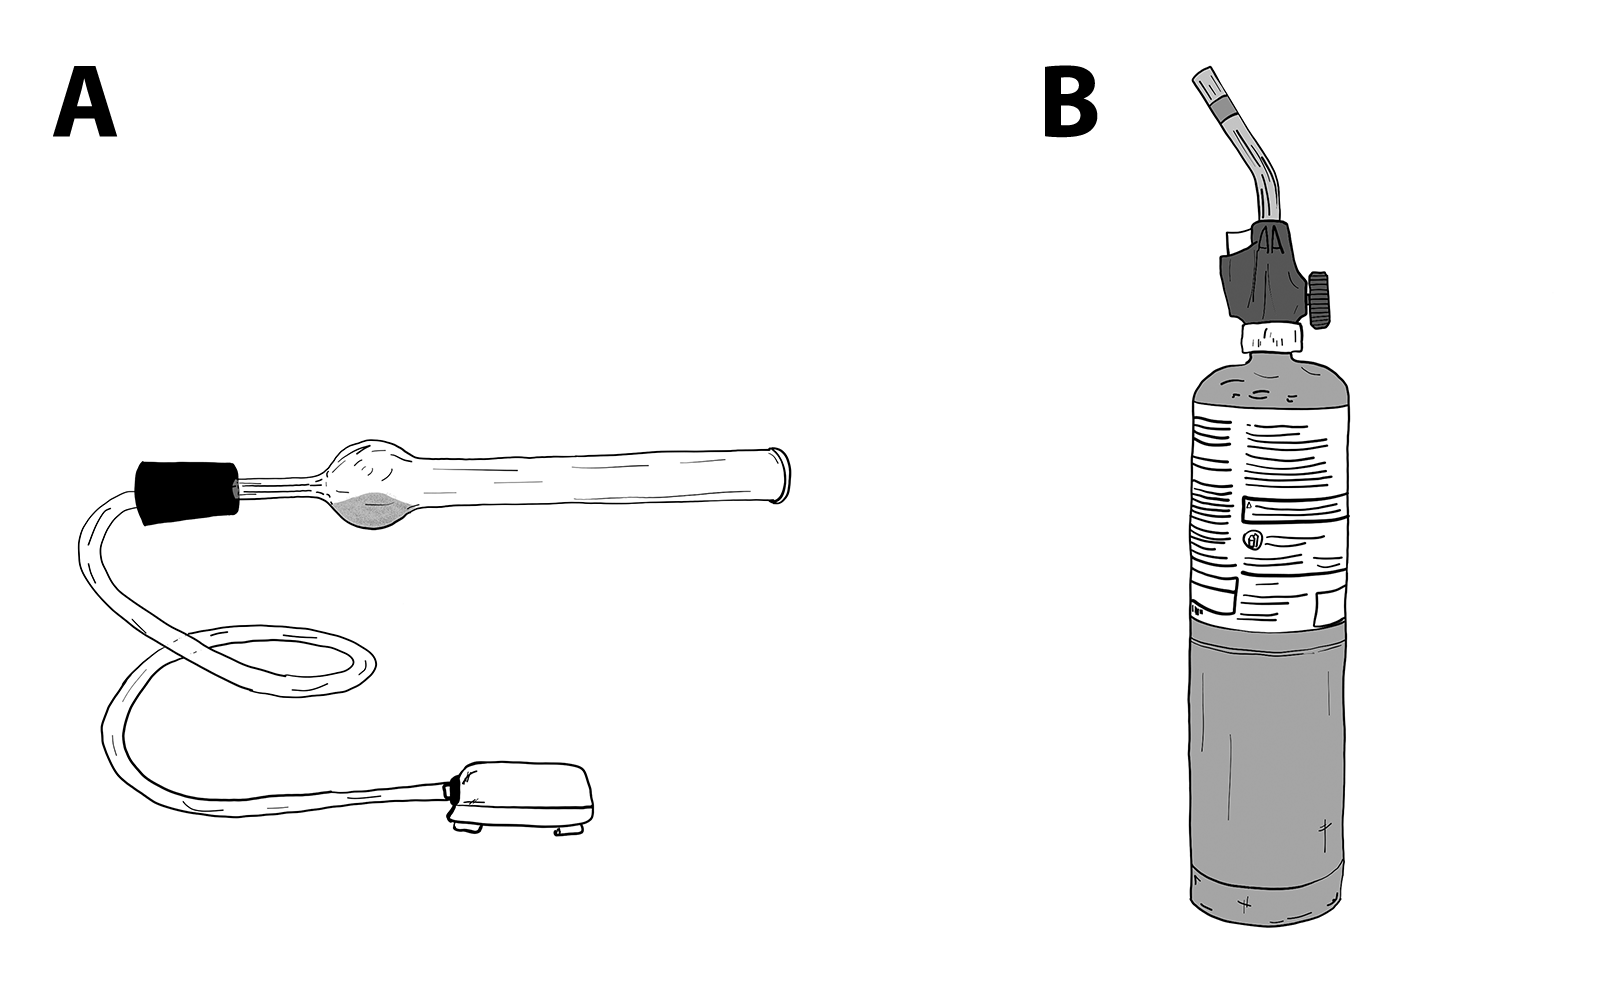
The device used to heat the powder is simple to make. The most difficult pieces to acquire are the lab equipment: the drying tube and rubber stopper. You’ll also need a simple aquarium air pump (usually under $10) and a length of aquarium tubing. In researching, I found quite a few different configurations of these, and it seems that it may come down to personal preference. The rubber stopper should have a single hole in the middle, and you can use a drill to expand it as needed. You will want to put the smaller end of the glass tube halfway into the stopper and insert the aquarium tubing into the other side. Some configurations have the drying tube facing the other way, creating a sharper vapor stream. I prefer a broader stream of vapor to coat specimens.
Heat the ammonium chloride powder inside the drying tube bulb to create the effect. First, fill the bulb with a small amount of powder to ensure the inlet and outlet are not blocked. Next, plug in and turn on the air pump to create a consistent air flow from the tube. You can do this outdoors on a dry, breezeless day or under an exhausted fume hood. You should wear eye protection and an N95 mask, as the vapor will irritate your eyes and airways. Ammonium chloride is used as an expectorant in some cough medicines, irritating the bronchial mucosa and causing a decrease in the stickiness of mucus. While it’s safe enough for use in medicine, you surely don’t want to breathe it in if you can avoid it.
Last, you’ll want to have a space to place the device when you are not using it. It will be scalding and can also melt the aquarium tubing. I lay it down in an old metal baking pan after coating specimens.
Choose your Final Background Color
If you want the final image on a white background, use white modeling clay or material to hold the specimen. Removing an object from the same color background later when processing the picture is more manageable. Remember that the smoke will coat most things it comes in contact with, so using a black background process will require more attention to detail.
Making Ammonium Chloride Vapor
First, ensure that the environment is dry. Coating fossils in a high-humidity environment will cause failures and frustrations. The coating will interact with the moisture and disappear before you can take a photo.
To start, ignite the flame on the propane torch. You do not need a large flame; a low to medium one will do. Then, using the setup in figure 1, you hold the device by the rubber stopper and move it over the flame, distributing the heat evenly over the bulb and across the tube. With heat added, the powder will decompose into two different substances, a combination of ammonia and hydrogen chloride gas. It then quickly recombines into ammonium chloride vapor. Heating the tube is also essential because the vapor will recrystallize and coat the tube if cold. Heating the tube can restart the process. Never heat the small tube near your hand.
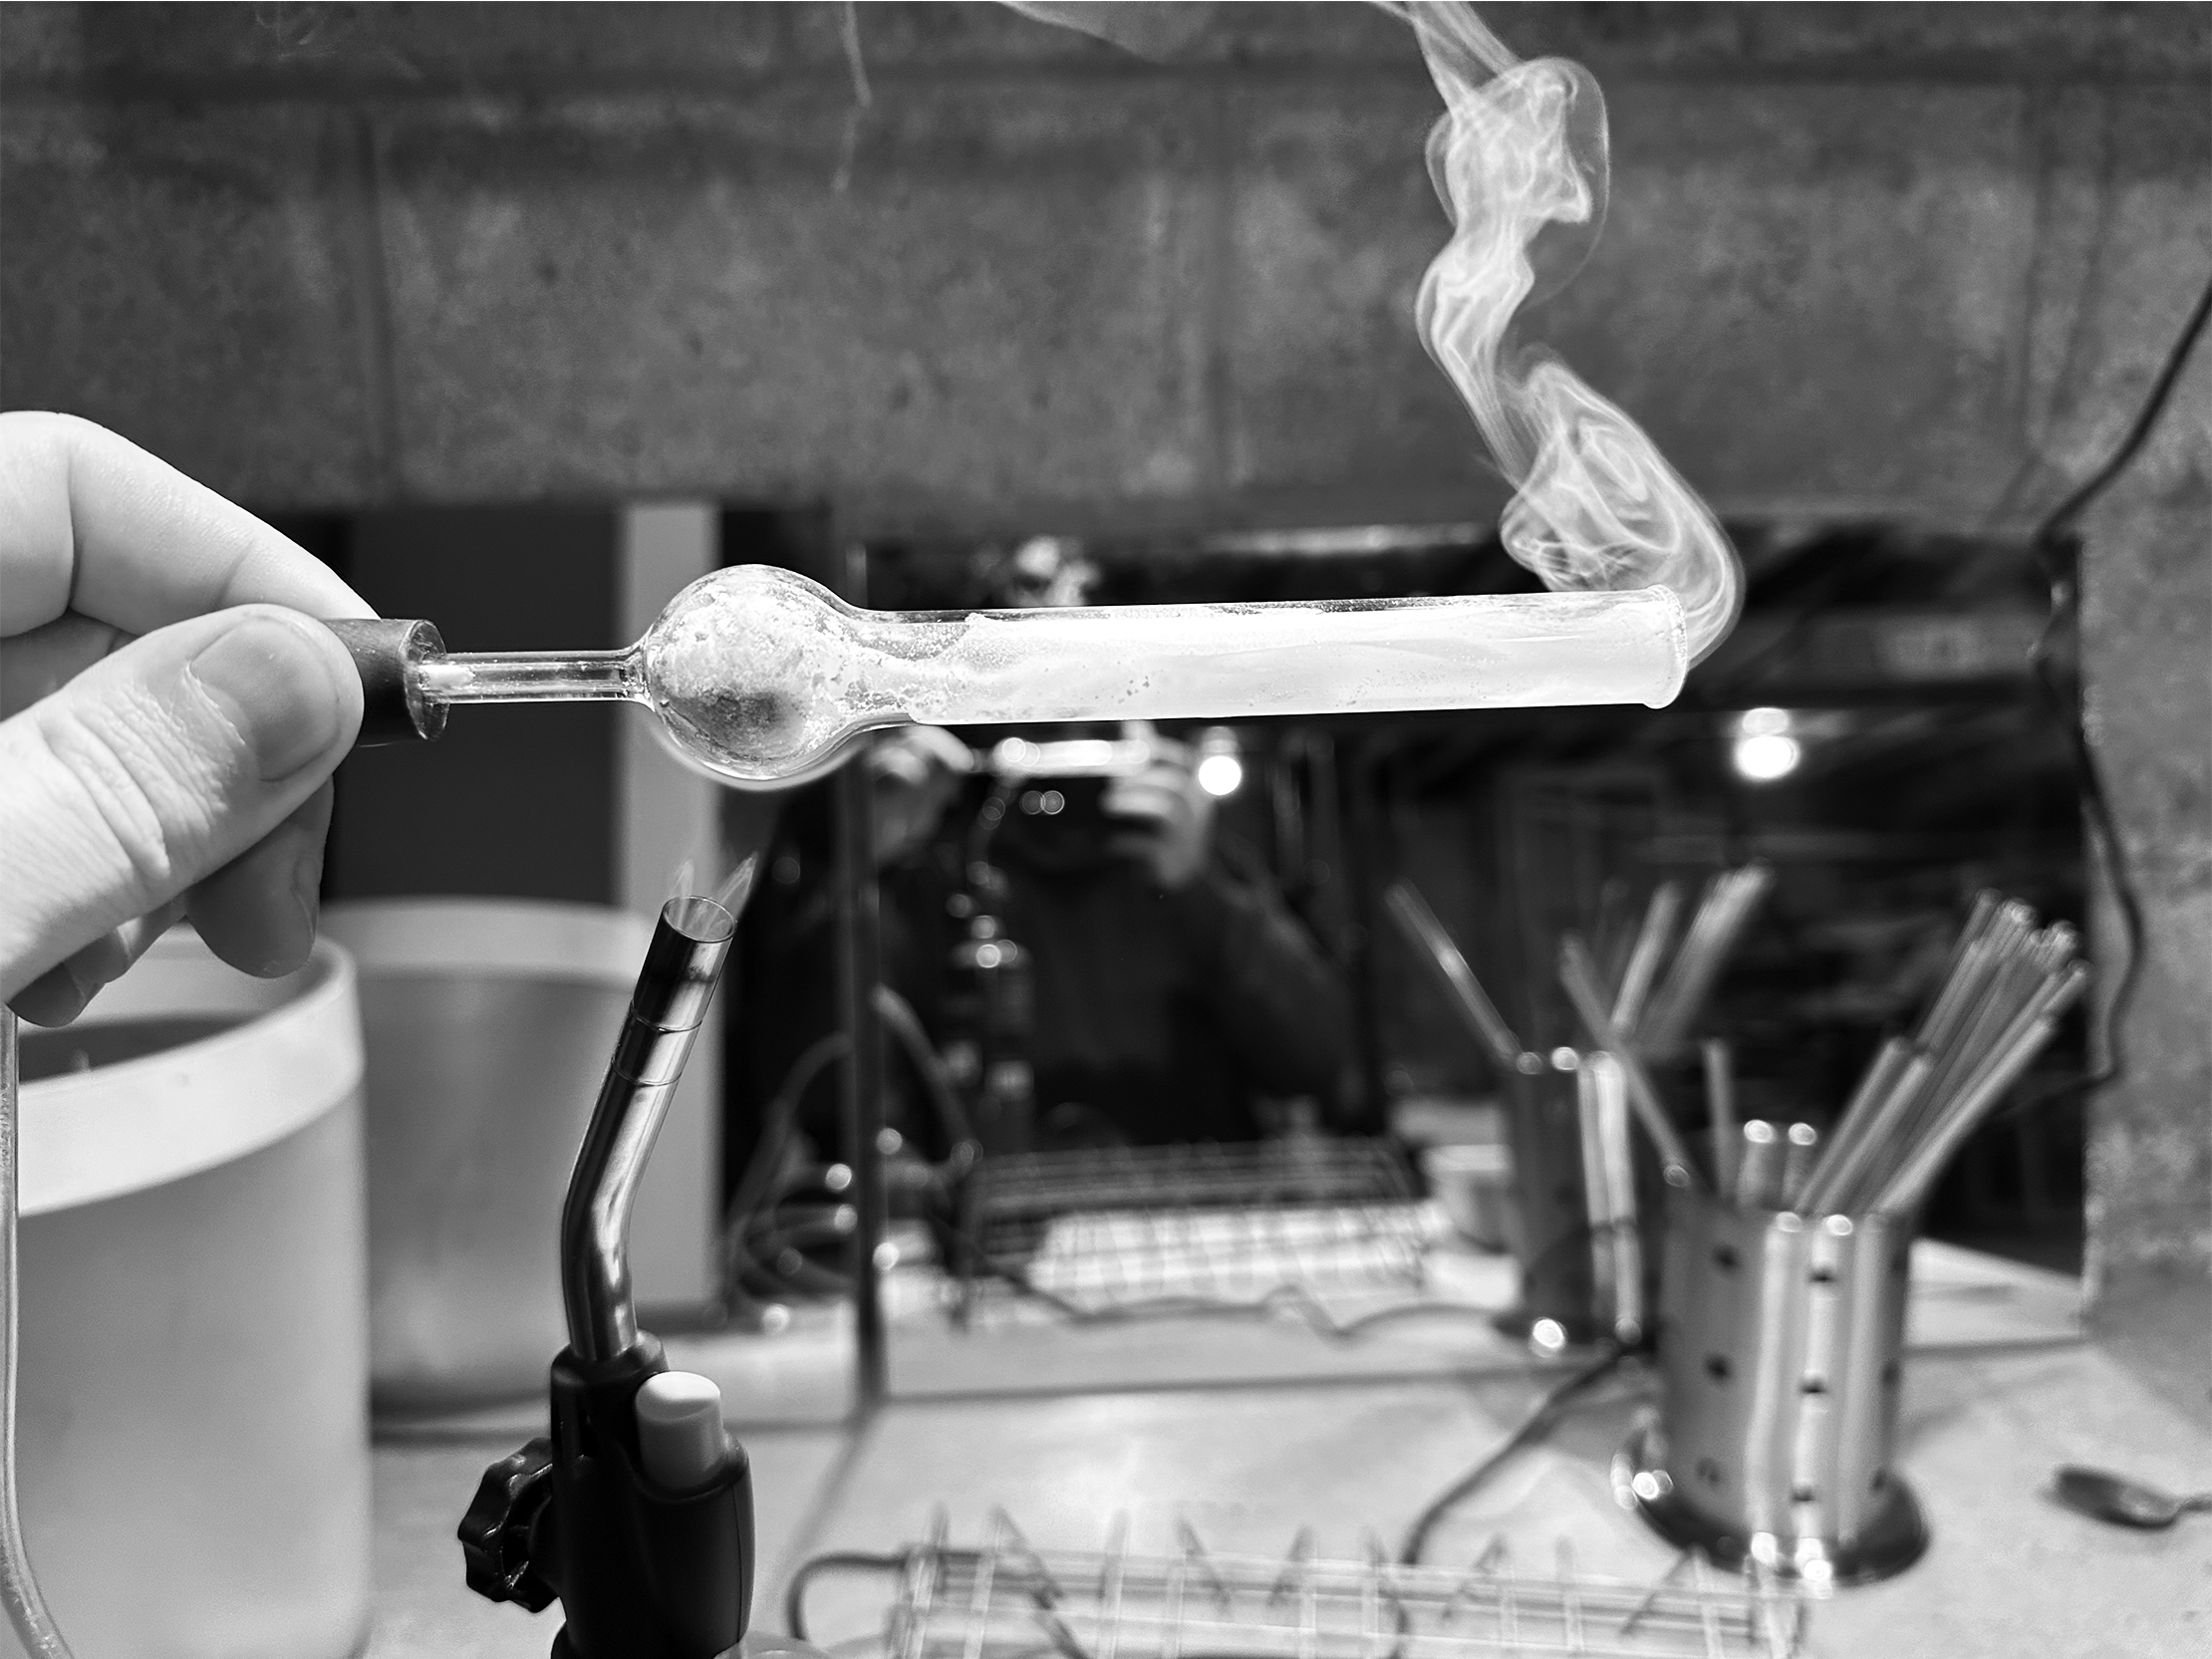
Next, direct the vapor over a dry fossil. The thickness of the smoke is important because you can add too much vapor to a specimen and reduce its fine details. As the vapor comes in contact with the fossil, it forms a white, brilliant layer of tiny crystals. This non-permanent layer is removable by applying water to the specimen or breathing on it; the moisture in a person’s breath is enough to remove the coating. Once you finish coating one or more samples, you can place the device somewhere to cool. An uncoating metal wire rack works well.
You may leave any leftover powder in the tube. Depending on the size of the bulb, you may get three or more uses out of one fill-up. The powder will deposit on the walls of the larger tube, and can still be vaporized later by heating the tube. If the glass drying tube becomes clogged, remove it from the rubber stopper and clean it with water once it is cool. Make sure it is completely dry before attempting to reuse it.
Setting up the Lighting
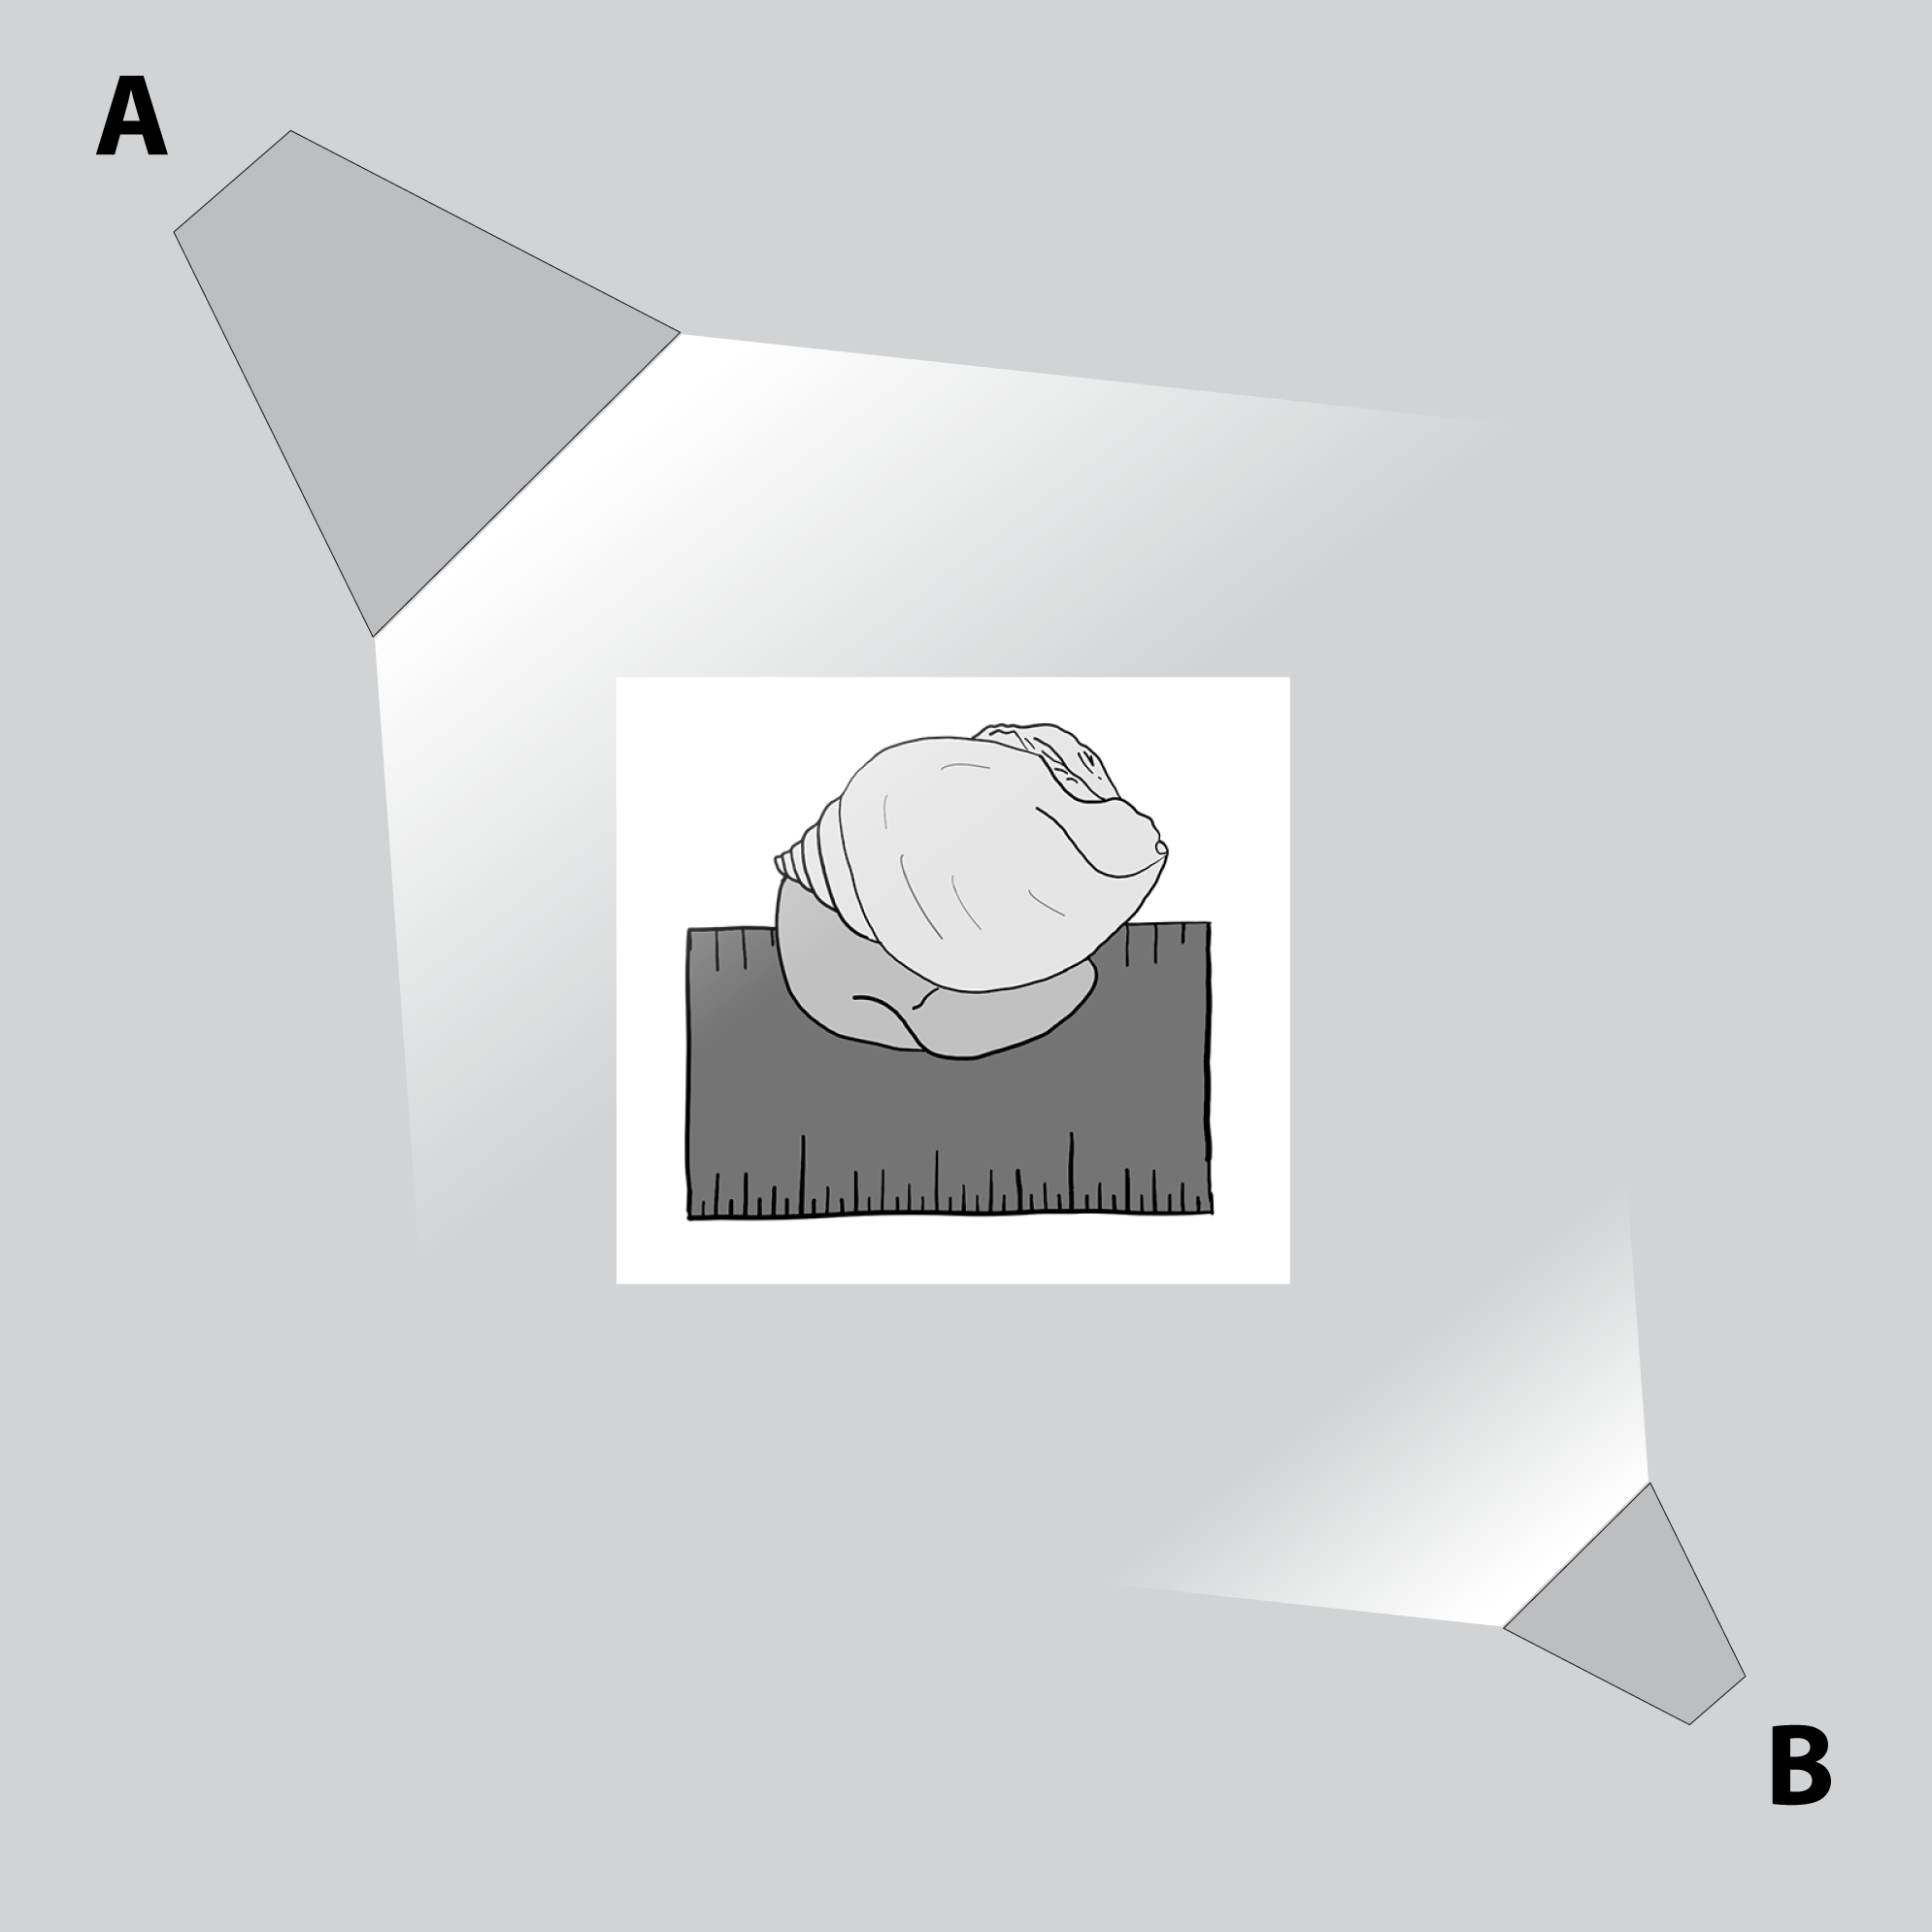
Cast a strong white light from the top left of the specimen at a low angle. A secondary light at the bottom right fills in heavily shadowy areas, such as the aperture on a gastropod shell. I place the specimen under a microscope for the majority of the photos. Use consistent positioning for species belonging to the same class. Reference figures from recent literature for ideas, authors photograph members of a particular class in the same position. For example, gastropods in spire view may have the same rotation across all figures.
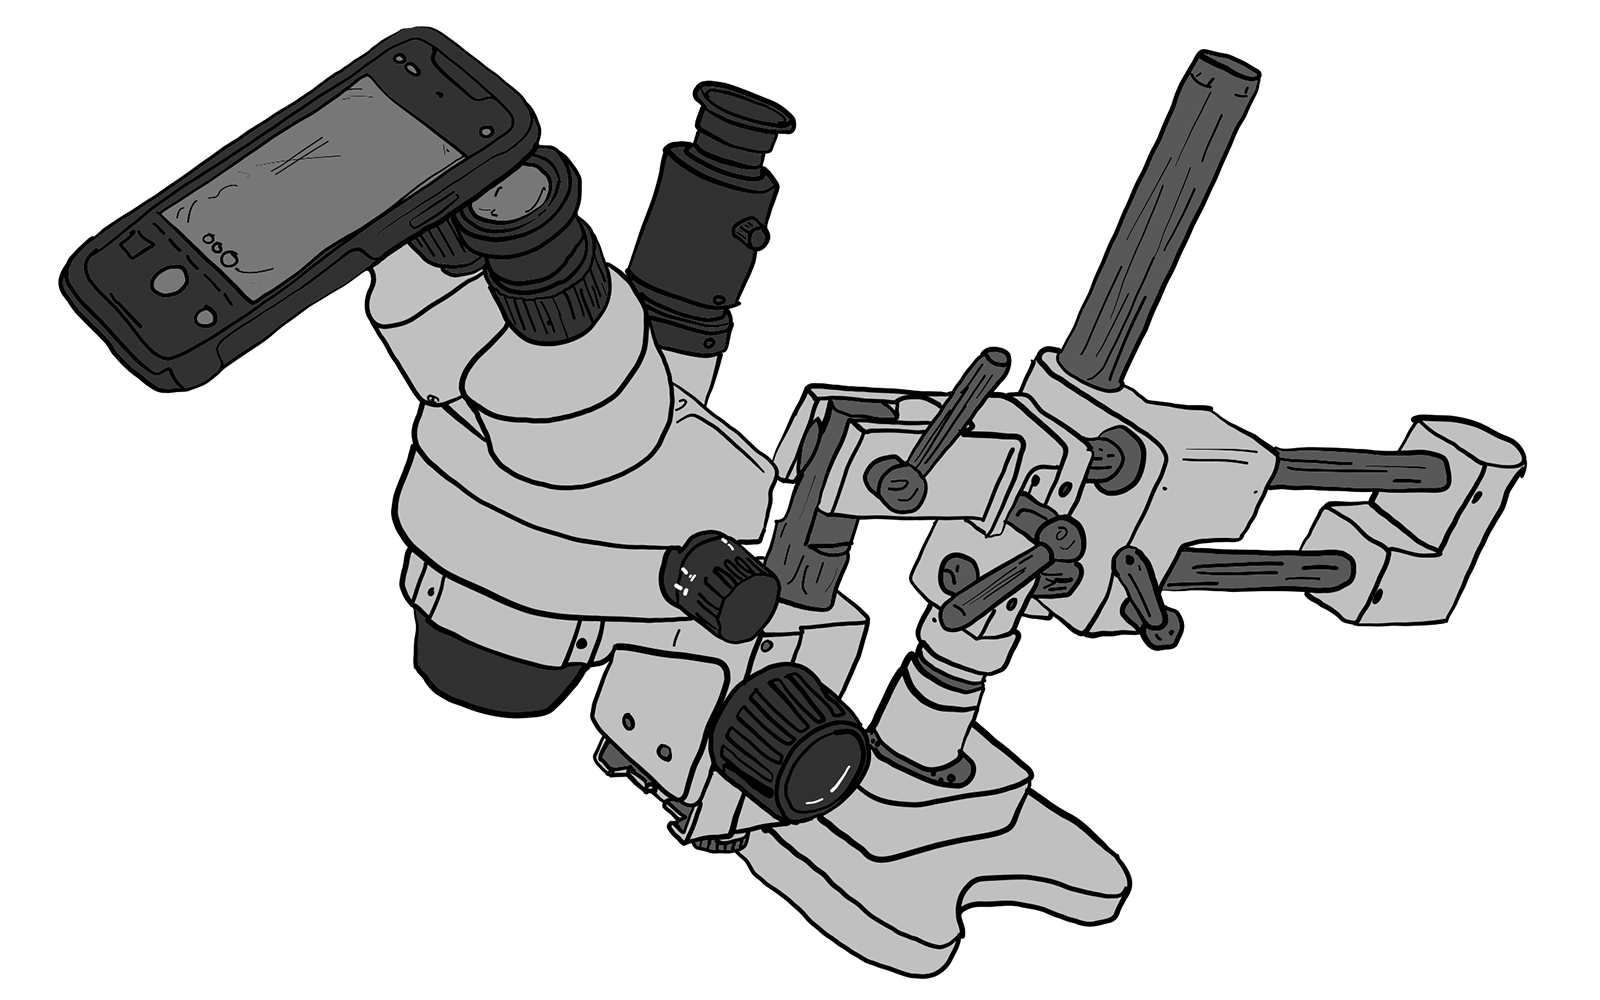
I take all the photos using an iPhone (11 Pro or 14 Pro), most using the 2X or 3X optical lens on the back.
Shooting the Photos Using a Microscope
I shoot the pictures by pointing the camera through the microscope eyepiece. I use an application named CameraPixels Pro on the phone that will automatically step through several planes of focus while I maintain its position over the eyepiece. You could use a tripod here, but using one with a phone is very difficult while maintaining alignment with the microscope eyepiece. The software offers a focus highlighting feature, which will live paint the focal plane on the image while you are operating the application. There are many options for file output, but I used jpg for this publication.
Depending on the optical zoom level, I take between five and fifteen photos within the camera’s focus range. If the specimen is wider than the field of view, I reposition it and take more shots to ensure I get all the detail. If the sample exceeds the camera’s focal range, I adjust the microscope focal distance between images. Some deep specimens require three or four focal resets to get everything. The largest examples in this book required up to seven different positions to capture all the detail.
The Digital Photography Workflow
I send the photos from the phone to a PC. First, I use a cloud service like OneDrive to drop the images from my phone. Next, I load them into a stack using Adobe Photoshop (free alternatives are available) and set them to align automatically (Files > Scripts > Load Files into Stack). The software uses several points of detail to align each photo. Depending on how many photos you took, you may have to stack different sets of photo views in batches. Using nearly 200 images in a single image is possible if it exceeds the range of the microscope.
For specimens with multiple positions, the edges that come in contact with each other get trimmed. If these are not trimmed, the software has difficulty stacking focus. Focus stacking (Edit > Auto-Blend Layers) is the next step, where the software masks all the out-of-focus areas on each layer to create one singular image that is in focus throughout the entire focus range. The software also adjusts the lighting to create one consistent image. Once the image is stacked, apply a sharpening mask (Unsharp mask at 75-100%) if the image is not sharp enough.
The last step is to remove the background. You fill the space with a background color and add a scale bar. You can use black, white, or another color depending on your preference. If I photograph several specimens at the same zoom, I take an extra photograph that includes a metric scale. You may include the scale in the photo if you have room.
This book uses individual photos but also heavily uses plates. Several shots are placed, aligned, and scaled so that all images on the plate are the same scale.
More Information

Late Carboniferous Fossils from the Glenshaw Formation in Armstrong County, Pennsylvania
Preface | The Photographic Process
Localities: Locality SL 6533 Brush Creek limestone | Locality SL 6445 Pine Creek limestone
Bivalvia: Allopinna | Parallelodon | Septimyalina
Cephalopoda: Metacoceras | Poterioceras | Pseudorthoceras | Solenochilus
Gastropoda: Amphiscapha | Bellerophon | Cymatospira | Euphemites | Glabrocingulum | Meekospira | Orthonychia | Patellilabia | Pharkidonotus | Retispira | Shansiella | Strobeus | Trepospira | Worthenia
Brachiopoda: Cancrinella | Composita | Isogramma | Linoproductus | Neospirifer | Parajuresania | Pulchratia